Quilotoa Loop
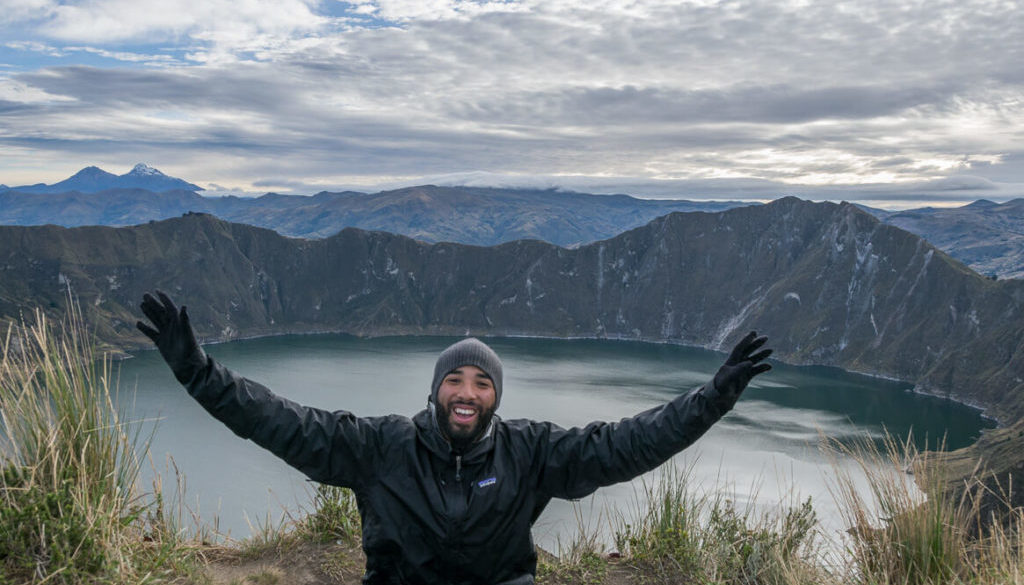
This is the ultimate hiking adventure in Ecuador. Having started my South American hiking in Patagonia every other trail has been a bit underwhelming to say the least, until The Quilotoa Loop. It’s was my absolute favorite four days in all of Ecuador and absolutely part of my top five South American highlights.
Things to Consider
The logistics of Quilotoa can feel like a nightmare at first. There are multiple starting points and the ability to travel in one direction or vice versa. Starting at Quilotoa makes for easier days to come but it’s also starting out at the main attraction. Will the rest of the trail be disappointing after seeing the highlight? Where to stay, what to pack, is it safe? Not to mention that Quilotoa despite being called the loop isn’t really a loop at all. Don’t worry, I’m going to answer all of these questions 🙂
Latacunga
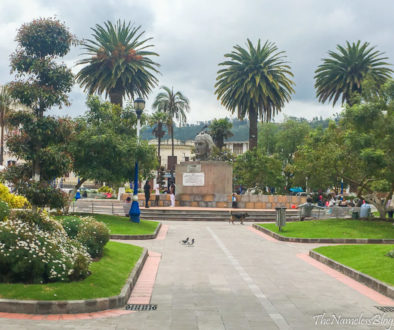
This is the staging point for the loop, it’s the closest place large enough to provide all the needs for travelers. Keep in mind that Quilotoa isn’t as popular as some other well known trails in South America but it’s quickly taking a top spot.
- Latacunga is a nice city, it’s a bit too large for my own taste but has everything you need for a pleasant stay. There is not much to do there, most people only stay one night before and after the loop.
- Arrive by bus from Quito (1.5-2 hours), Quevedo, Ambato (1 hour) or Banos.
- Note: Some buses from Banos and Ambato will be heading for Quito and drop you off at the intersection of the main road to Latacunga. From here you can wait for the next passing bus headed for Latacunga terminal. Or alternatively you can take one of the many waiting taxi $3-5 to the center of the city. Agree on a price first!
- I stayed at Hotel Central right along the main square. $10 p/p for private room. You can leave your belongings locked in their closet at no additional costs while on the loop.
The Plan
Now you have to decide on where route you want to take.
- Option A: The “proper loop” in full is Latacunga, Sigchos, Isinlivi, Chugchilan, Quilotoa, Zumbahua, Latacunga.
Keep in mind that most people on the proper loop skip out on Sigchos and take the bus straight to Isinlivi to start. I couldn’t find much information on why everyone seemed to skip out on Sigchos. In the end I concluded that everyone talked very highly of the bus trip Latacunga to Isinlivi. The ride is supposed to take you through some of the most amazing landscapes. Unfortunately for myself after deciding to go for the beautiful bus ride instead of the extra day’s hike the bus driver took an alternate route via Sigchos anyways. I never did get to see what everyone was raving about but I can tell you Sigchos won’t be anything to cry over if you skip out on the town as well.
Note that option A starts around 2800 meters and ends around 3800 meter. That’s right, this route will put you against more uphill battles than the reverse route.
- Option B: Hike the loop in reverse for most people this will include a bus from Latacunga to Quilotoa skipping out on Zumbahua which is mostly walking along the road. This option starts at the highest altitude of the loop around 3800 meters. It’s appealing to many people because you’ll have less uphill climbs compared to hiking the opposite direction. But make no mistake, you will still face a fair share of intense climbs.
Sample Itinerary
Because I like you guys I’ve added the details of my own experience. I started in Isinlivi from Latacunga and ended in Quilotoa, but if you rather start in Quilotoa just read the directions in reverse.
The Proper Loop (or at least part of it)
Day 1
- Bus from Latacunga to Isinlivi, $2.85. Leaving 1215, 1230, 1300 Monday through Friday. It’s a good idea to get to the terminal early. Buses in South America seem to have a mind of their own and schedules can vary from day to day. If traveling on a weekend, I recommend going to the station early or the night before to confirm departure times.
- If you want to start in Sigchos the buses are much more frequent starting at 0500 continuing to 1700.
- The bus makes many stops and took about 3.5 hours to arrive to Isinlivi.
- Spend your first night here. Two options LuLu LLama or Hostal Taita Cristobal. LuLu is without a doubt the more popular accommodation. This is the only place on the loop you are better off making a reservation. I personally stayed at Hostal Taita. It’s a beautiful lodge on the same street as LuLu overlooking a beautiful valley. The staff is great and the food is wonderful. $15 gets you a bed, dinner and breakfast. The place has hot water and wifi although you should leave your wifi addiction in Latacunga for this one.
Day 2
- Wake up early and pack your things. Breakfast is served either 0700 or 0800.
- 6.5 hour day but I walk slowly 🙂
- Leave out directly finishing your meal. The common weather pattern along the whole journey is bright blue cloud free mornings with intermittent torrential downpours usually starting 1300 there on out.
- The hostel will provide you with a less than stellar map. Make sure to get verbal directions as well. This stretch of the journey is the least well marked so expect to get a bit lost.
- Leaving the town head down the road into the valley crossing a bridge.
- From the far side of the bridge you’ll start noticing rocks painted yellow, Follow them eventually leaving the road and heading through some cow fields up the other side of the valley. You’ll cross over one dirt road, continue following the painted rocks.
- You’ll come to a SECOND dirt road, follow it to the RIGHT.
- Next you’ll come to another split in the road, left, right and downhill. Take the down.
- Follow through the hills eventually you’ll see a small yellow sign advertising Hostal Taita. This is where I met a group with tour guide. He showed me a hidden path leading off the right of the cliff. You won’t see it unless you walk over to the edge. You can follow this down to the river and cross a rickety old suspension bridge.
- Alternately you can continue on the main path which will eventually take you to a concrete bridge crossing. This way is slightly longer than the path described above.
- If you cross the suspension bridge take the road heading left. Eventually you’ll run into a small shop where you can buy some snacks if you’d like.
- At the shop continue on the leftward path leading you through a small town. From here on out the trail markers become much better.
- Follow the sign making a right past the town and start your climb towards the ridge. This is where the rain and hail started.
- Atop the ridge there is a beautiful mirador point. After you take your break walk back down to the main path and make a left. Do NOT continue along the detour path you took for the mirador.
- Soon you’ll come to the main paved road. Follow it until you reach Chugchilan. Stay the night in Cloud Forest. $15 including dinner, breakfast, wifi & hot showers.
Day 3
- Around 7 hours with breaks.
- This trail between Chugchilan and Quilotoa is marked very well. Leave out the hostal uphill and make a left at the biblioteca.
- Follow the signs making a left and heading downhill into the valley.
- This trail is much easier to navigate and the map Cloud Forest provides is fairly decent including written directions as well.
- Eventually you’ll reach the Quilotoa crater. If you have the energy and the is weather is being kind you can hike to the left and reach the town in 3-3-.5 hours. Or hike to the right and reach the town in around 1.5 hours.
- Quilotoa is under massive construction. What once was a small village will be a prime tourist location in a few years. There are plenty of accommodations with many more in construction at this very moment. You can also find many shops and restaurants.
- I stayed at Hostel Cabanas Quilotoa for $10 including private room with wood burning stove, hot water and wifi. Meals were not included in this price but I wanted pizza anyways ! (I do Not recommend eating at this hostel).
Day 4
- Today there are a few options. My favorite, wake up before sunrise and watch the sun come up over the crater. You can also hike down to the base of the crater and back up. I personally opted out of this option because I personally feel the beauty is from above not actually down inside the crater. Lastly you can hike the trail circling the entire crater in around 5 hours. Whichever option you decide you’ll be treated to amazing views.
- Following this you can hike to Zumbahua or take the bus. After hearing that most of this would be along the road and being skeptical if anything there could be worth the sweat compared to the laguna I opted for the bus back to Latacunga.
- Buses leave Quilotoa from the main road every two hours starting at 1000 until 1600 for $2.50. Following 1600 until 2100 you’ll need to take one of the pick up trucks to Zumbahua for $2 and connect to Latacunga there.
- Note that the when asking locals for directions to the bus stop most people said the first bus isn’t until 1200 or 1300. Especially the truck drivers which want you to ride with them to Zumbahua. This is NOT true, the bus arrived at 1000 as scheduled.
- Back in Latacunga some people stay a night to relax, others head straight off for Quito or Banos.
What I Spent
- Accommodation: $40 for 3 nights. Not including costs of staying in Latacunga.
- Food: $20. Included dinner and breakfast is largely the hostal standard on the loop. Some places offer boxed lunches for around $5. I bought snacks at the grocery store next to the Latacunga bus terminal to serve as lunch. The additional costs were for pizza in Quilotoa.
- Transportation: $5.35 for buses to and from Latacunga.
- Total: $65.35 for 4 day/ 3nights.
Afterthoughts
I love hiking, the trails in South America have made up most of my personal highlights this trip. I’ve never done a guided trek or rented a pack animal for any of the trails. Considering everything, Quilotoa felt almost luxurious to me. This might be the best price vs quality trail that you can do in all of South America. Not to mention it’s a great feeling to be able to put away your fully packed backpack. It’s nice to arrive to a cooked meal, have a hot shower and not worry about pitching the tent at the end of the night. I never thought that anywhere else in South America could come close to the beauty of Patagonia, but The Quilotoa Loop is seriously even matched. If you do one thing in Ecuador, make it the loop. (okay, okay if only one then probably go to Galapagos 🙂 but second to the islands Quilotoa is the ultimate option).
Start the hike in Isinlivi! Leave Quilotoa as the icing on the cake!
Sure, it’s a bit harder but neither direction is easy.
Best Tips
- There are no atms on the loop! You have to bring all the cash you’ll need with you.
- Leave your bags in Latacunga. Nearly every accommodation will store your items for free after your stay. If you feel you need top security for any valuables Hostal Tiana near the downtown will store your bags for $1.50/day in a locked and recorded area even if you didn’t stay with them.
- You’ll encounter tons of kids. Most will ask for some sweets or some money. I opted to buy a bag of candy from the supermarket in Latacunga to handout to the kiddies.
- Bring rain gear. Many blogs I read said it wasn’t necessary but this comes down to personal luck. If you’re lucky enough to have blue skies the entire time then no need. But if you’re like me then you’ll get hit with enough rain and hail to justify carrying rain gear.
- Start out as early as possible, the weather seems to turn for the worst around 1300 and later.
- Pack warm clothing. The temperatures are rather pleasant on most of the loop and the hostels provide tons of blankets for those who run on the colder side. But Quilotoa is COLD before and after the sun. It’s the only place I wore my thermals but I was glad to have them!
- Lastly be aware that the destination towns are all connected by daily buses and if at any point you don’t want to continue you can catch an onward bus from the main roads.
Safety
- Quilotoa loop is largely known to be safe for travelers. Most of the people are extremely lovely and helpful.
- The one thing that I noticed (and I feel a bit bad speaking about, but it’s true of my personal experience) are the kids. Not the tiny cute ones but the ones that appear upwards to 13 or 14 years old. At times you’ll encounter swarms of kids along the trail they all circle you and want to practice their English, eat sweets and touch on all your belongings. At one point a boy probably around 13 walked by and asked for some money I told him I had some snacks he could have. Reaching in my pocket I noticed they were all gone so I asked my hiking partner to go in my bag to get more. As soon as she opened the bag the boy ran up the side of the hill to get a bird’s eye view of what was inside. Honestly it made me feel a bit uncomfortable that this kid was so quick to try to see what I was carrying. The boy continued to walk with us later we stopped for a break where he asked for my water bottle. I gave it to him and as we all started to walk again he picked up my hiking pole. I thought nothing of it until he started to take the side path down to his house. At that point I called to him and asked for it back after a minute or two he reluctantly handed it over. I met another female traveler who was swarmed by curious kids and realized her water bottle was gone after the encounter. Not a big deal, but moral of the story, just be a bit careful with your belongings along the trail.


50 Travel Bloggers You Should Be Following Right Now - Soapbox
March 12, 2018 @ 6:33 am
[…] Quilotoa Loop – Link […]